
A Sheridan 190B: Part Four


Sheridan 190B.
This report covers:
- The test
- Backstop
- First up-rifled slugs
- Velocity with rifled slugs
- Velocity with wadcutters
- Velocity with domes
- Discharge
- Discussion
- Fewer pumps
- What has been learned?
Today we look at the velocity of the three 3D-printed projectiles reader Ian McKee made for the Sheridan 190B tranquilizer pistol. I will tell you now that this test was unlike any other!
The test
The first thing I had to do was to figure out how to test this thing. It is not like any airgun I’ve ever tested. And the ammo is 3D-printed for the gun, so we are way off the reservation today!
I decided to pump the pistol 10 times per shot. I knew from experience that would be a lot of pumping, so I decided to shoot strings of 5 shots. But when the test started and I realized what it actually took, the number of shots per projectile dropped to three for reasons you will soon learn.
Ian printed three types of projectiles, a wadcutter, a dome and one that looks like a rifled slug. I tested each type separately.
These were printed white to make them easier to find. Ian did print a couple black domes but they are very light and not well balanced for good flight. I didn’t test them.
Backstop
Many readers had suggested that a fabric backstop would be best and I knew from my days of airsoft testing that was the way to go. But would a common blanket be enough to do the job?
Not wanting to find out the hard way I used my army duffle bag as a backstop. It’s tough canvas and is so old that it doesn’t have backpack-style carrying straps like the more modern ones. It’s the toughest fabric I own. I learned during the test that pulling one side of the fabric away from the other to let air into the bag gives additional cushioning to the shot. That stops the projectile more certainly, while hitting a taught canvas bag causes a lot of bounce-back!
I put a soft cloth blanket on the floor to stop projectiles from rolling away, but of all the ones I shot, only one stayed on the blanket.
First up-rifled slugs
The rifled slugs were the first to be tested. They weigh 23 grains, nominally. These are the projectiles that have a 6mm airsoft ball in their nose. Ian said he did that so the weight of the projectile would be easy to adjust because airsoft balls come in different weights. He also did it because it made the weight of the projectle biased toward the front which should give a more stable flight.
On the first round I learned that 10 pumps is too much. It’s not that hard to close the pump handle but to open it for the pump stroke takes a LOT!
Up to 5 pumps it’s pretty easy to open the pump handle, but then it starts to become difficult. After seven pumps it is very difficult to separate the pump handle and after eight pumps it’s nearly impossible. Also because the 190B is a pistol the hand that isn’t pumping has to grab the pistol around the rear sight which it is painful.
Velocity with rifled slugs
The first slug loaded very tight in the breech. I had to bump the bolt to close it. It then went out at 325 f.p.s. Since the slug weighs 23 grains it developed produced 5.4 foot-pounds of energy at the muzzle. Here are the three shots:
Shot……………Velocity………….Fit the breech
1……………………325…………………tight
2……………………317…………………tight
3……………………330…………………loose
As you see, the third slug fit the breech loose and did increase in velocity. The average velocity for the three shots was 324 f.p.s.
As Ian noted, the white projectiles are easier to see in flight. That will come in handy during the accuracy testing.
I did lose one slug that bounced back rather fast and from the sound it made is probably on my workbench. Maybe it’s next to the Markpoint lawyer trigger spring.
Velocity with wadcutters
The second projectile tested was the wadcutter that looks like a smallbore pellet. This one weighs 18.16 grains nominally. The three pellets went out as follows:
Shot……………Velocity………….Fit the breech
1……………………321…………………loose
2……………………342…………………snug
3……………………322…………………not quite as snug as number 2.
The average velocity for this projectile was 328 f.p.s. and at that speed it generates 4.34 foot pounds. None of these were lost in testing.
Velocity with domes
The final projectile tested was the 23-grain dome. Here is how they performed:
Shot……………Velocity………….Fit the breech
1……………………284…………………loose
2……………………299…………………tight
3……………………299…………………tight
The average velocity for this projectile was 294 f.p.s. and at that speed it generates 4.42 foot pounds of energy. I lost two domed projectiles in their velocity test.
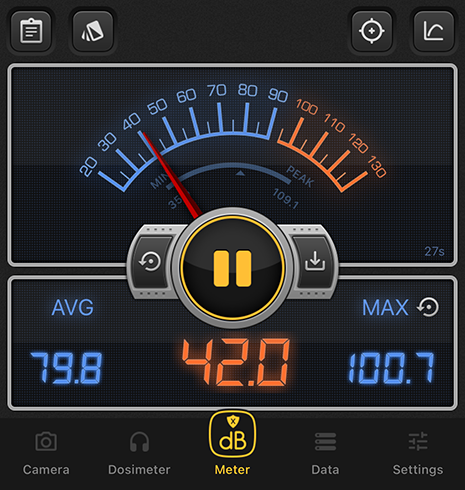
Discharge
On 10 pumps the pistol generated 100.7 decibels.
Discussion
As you can see the 190B is not a powerful big bore. But it is safer for shooting around and even inside the house. Wear safety glasses though because there will be bounce-backs.
Fewer pumps
I wanted to see what a fewer number of pumps would give. For each of the following shots the pistol was pumped five times.
Projectile…………….Vel.
Rifled slug……………..267
Wadcutter……………..239
Dome…………………….217
What has been learned?
From the breech fit we learned that even when projectiles are 3D-printed they aren’t always the exact size. The white color does make them easier to see in flight. And a snug fit is perhaps the best one. This could be done through sorting during shooting.
I also learned that the softer the fabric backstop the less bounce-back there will be. But unless the fabric is loose you’re going to lose some projectiles. In fact losing them will be a bigger problem than wearing them out, because they show no wear after being fired repeated times.
And finally I learned that this pistol is very hard to hold while pumping. Anything over 7 pumps is very difficult to achieve. The Sheridan 178B long gun would be easier to pump I’m sure.
The post A Sheridan 190B: Part Four first appeared on Pyramyd AIR.
Related Posts

Repetition is the key!
Ukulele. This report covers: Ukulele Guitar players However Repetition No callouses? Today’s report will be…

The Krummlauf STG-44: Nazi Germany’s Wildly Ingenious Curved-Barrel Rifle Attachment
Some inventions in firearms history come across like something from pulp science fiction—concepts so peculiar…
Forging Firepower: The Rise of Breech-Loading Carbines in the American Civil War
When the American Civil War erupted in 1861, the U.S. Army’s standard-issue firearm remained the…
Leave a Reply
You must be logged in to post a comment.